Masks > Fabrics & Notions

Fabrics & Notions
Fabric
The masks require at least two layers of fabric: one outer piece and one lining piece. You can use the same fabric on both the inside and outside, but I prefer to use a different fabric to line, so I can save the “pretty” fabric for additional masks.
I typically use 100% cotton fabrics intended for quilting. They are breathable, easy to use, and come in a variety of fun prints. I tend to purchase Fat Quarters (about 18”x22”.) I can get four masks out of a Fat Quarter if I use a different fabric to line, and I don’t usually want more of any one print than that. (Read more about fabric sourcing and selection here.)
For the lining, you can use coordinating prints or solids to complement the outer fabric. This can be very attractive and fun for the wearer, but for simplicity I tend to stick with neutrals. I stock up on colors such as white, ivory, taupe, and grey, which work well with most fabrics. I like a sturdy quilting cotton such as Robert Kaufman Kona, but I also often use good quality 100% cotton percale sheets.
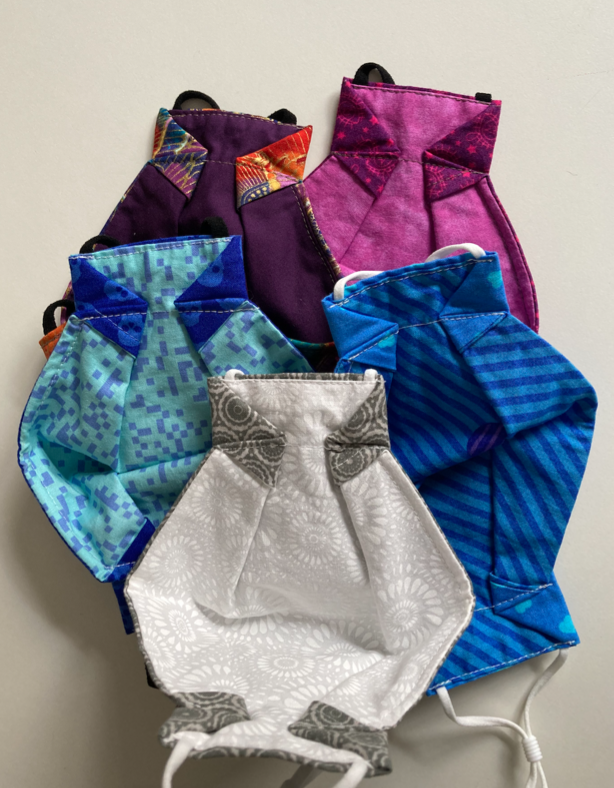
Lining with complementary prints or colors can be attractive and fun for the wearer.
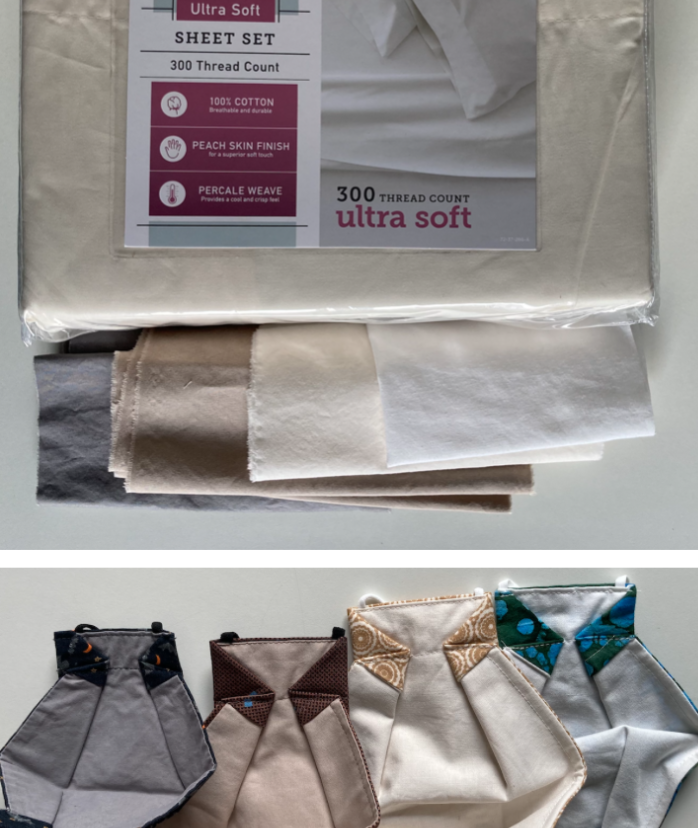
Neutral shades work well with many outer fabrics and are easily found in bedsheets or quilting weight cottons.
Elastic
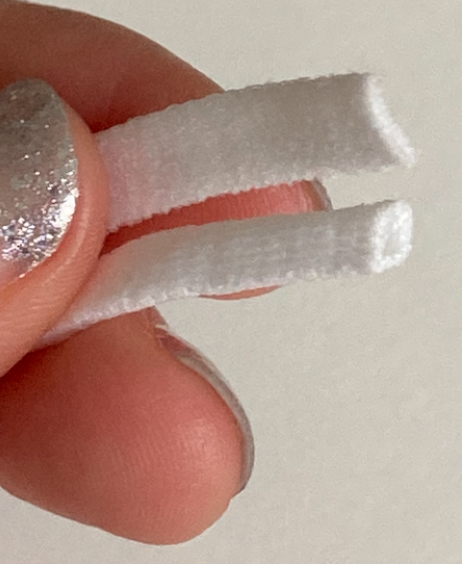
I like elastics described sometimes as “soft knit.” It is, indeed, soft and very stretchy, usually made from nylon or polyester and spandex. I also believe it is latex-free, but labeling can be iffy so I don’t make that claim. I find it on Amazon and buy black and white in the large spools. Look for one that is at least ¼” wide and has a flat appearance. The ⅛” round cord version is a little flimsy for adult size masks. I buy elastic on large spools of 100+ yards, but you can buy smaller hanks or even pre-cut elastics with the adjuster already on. If you buy pre-cut elastics, make sure they are at least 8” long, and when choosing a quantity remember that you need two per mask.
Note that this elastic is not the kind made with rubber strands, which are the typical elastics you would find in the notions department of a fabric shop.
Silicone sliders
You can find silicone sliders in a barrel or disc shape online. Either shape works, but I tend to use the barrel shape for adult masks. They look bulkier than the disc sliders, but I don’t notice the bulk and I find the barrel sliders easier to adjust while wearing. I use the discs on children’s masks. Since I use both styles and in black and white, I buy a bulk pack that includes some of each.
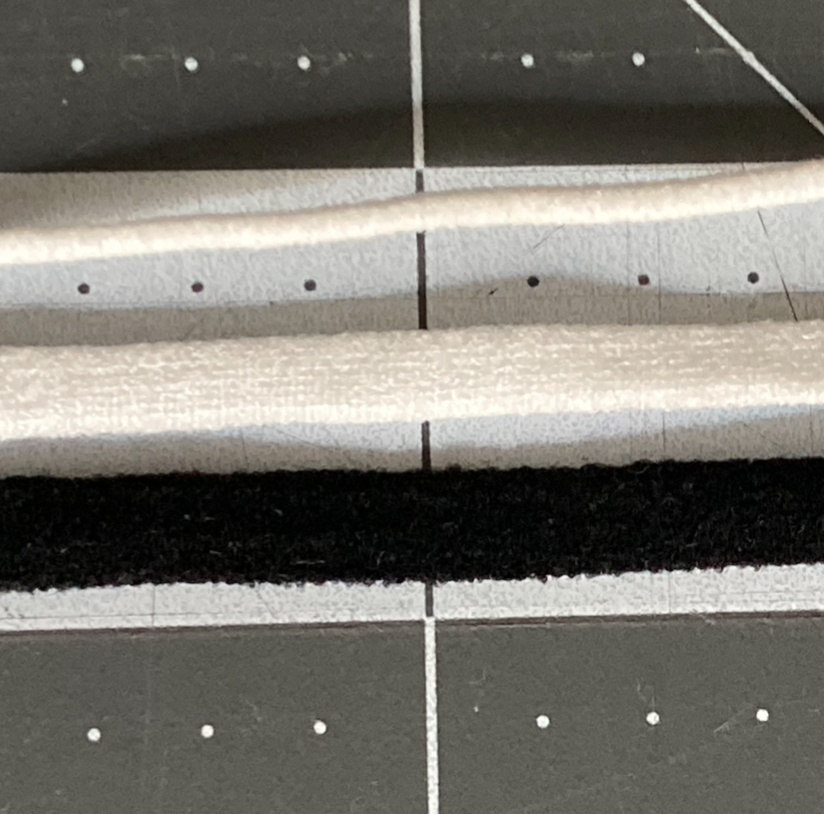
Look for "soft-knit" elastic in 1/4" width (bottom two), not the 1/8" round cord (top.)
Soft knit elastic comes in both a flat construction with a fuzzy surface (top) and a smoother tubular construction (bottom). Both will work for this style mask.
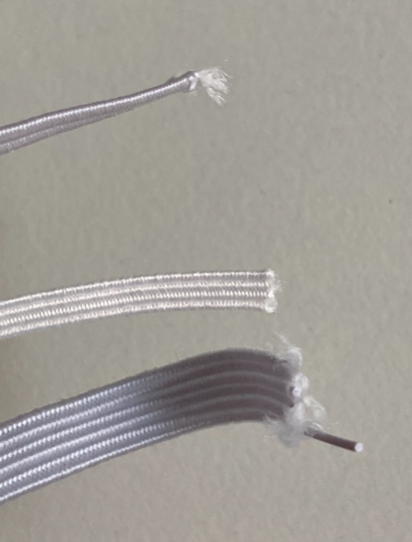
These aren't the elastics you're looking for...

Soft knit elastics come on large spools (top), in hanks (bottom right), and in pre-cut lengths with or without slide adjusters (middle left).
Nose wires
The right nose wire helps it mold to the shape of your face for a better “seal,” and also helps to keep the mask up without needing too much tension on the elastics, saving your ears.
I like to use a plastic-coated wire (twist tie) sometimes described as “oval,” meaning the coating doesn’t extend out on the sides of the wires. Those wing-like extensions can get distorted and are hard to straighten out, whereas the oval shape stays relatively smooth, even after multiple wearings and washings. Look for something 2mm wide and 150mm (about 6”) long. I find the wider aluminum nose bridges too rigid, but you may have a different preference. Do not use paper-coated twist ties as they won’t hold up in the wash.

"Oval" twist ties (left two) are flexible but maintain their shape well. Twist ties with "wings" (right two) distort easily.
Thread
Be sure to have enough polyester or all-purpose thread on hand. You can try to match your outer fabric, but if you will be sewing a lot of masks, it is simpler and more cost-effective to buy larger spools of a few colors. I tend to stock up on the same colors I use for my linings: white, ivory, taupe, and grey. Between them I can usually find something that blends in well enough with the outer fabrics. Since I sew large quantities, I buy thread on cones and use a thread stand.
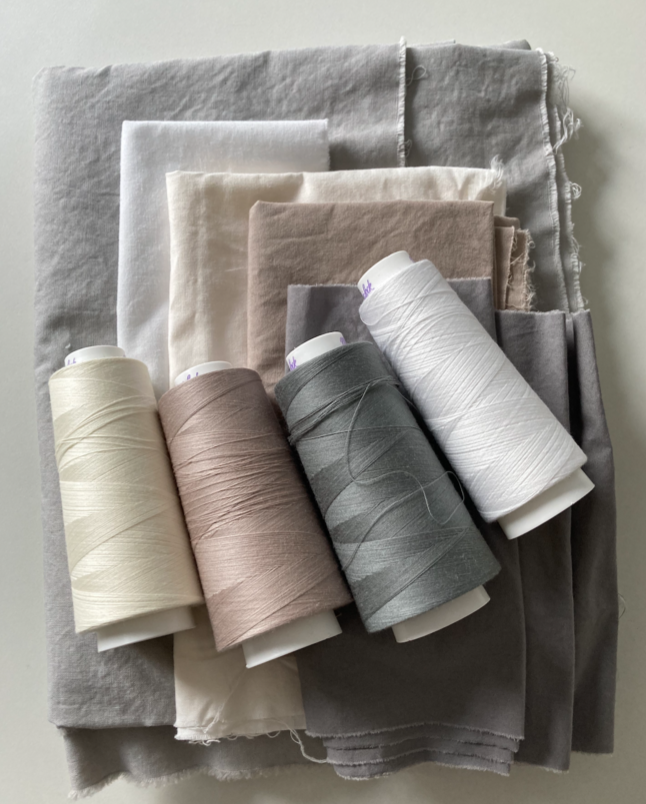
Thread cones in the same colors as the main lining fabrics.
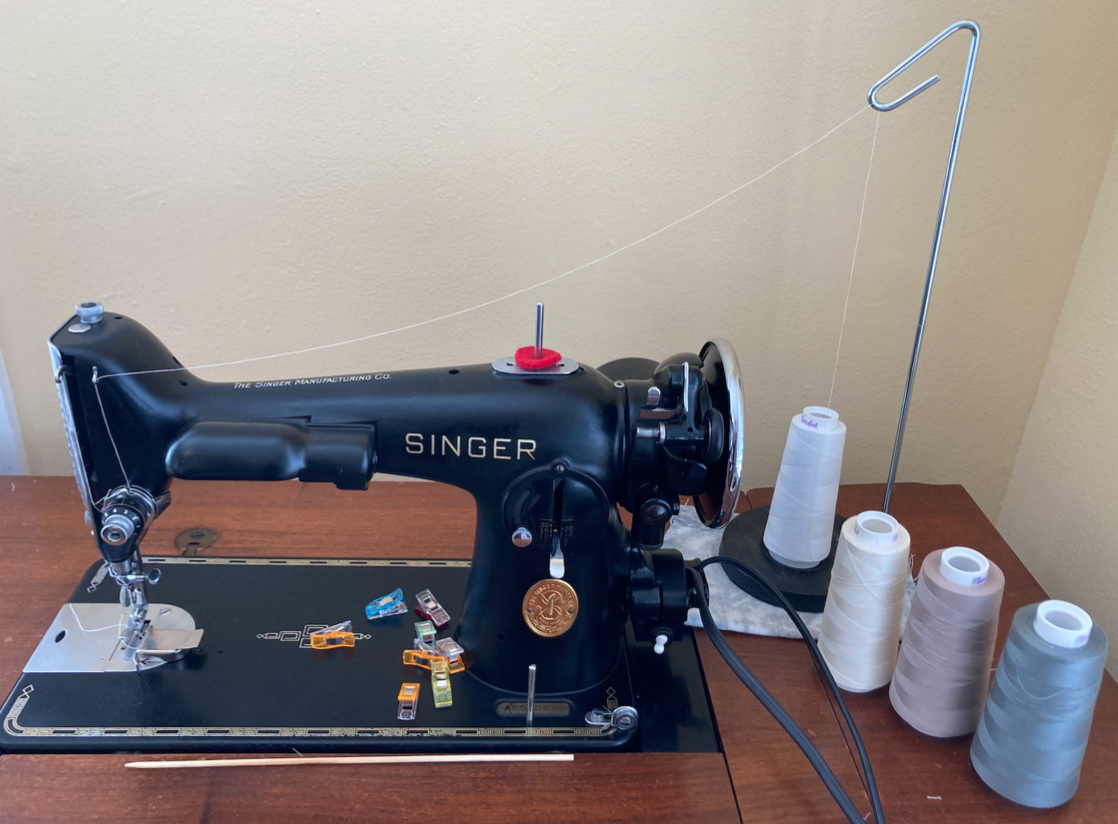
Cone thread is economical, but requires a thread stand to use with a home sewing machine.
Sewing machine and needles
The tutorials on this site are intended for sewing with a home sewing machine. It requires only a straight stitch (forward and backward), and the ability to make adjustments for thread tension and stitch length. You do not need fancy stitches or even a zig-zag.
You will need a supply of fresh sewing machine needles. If you’ve never replaced the needle in your sewing machine, now is a good time to learn to do it. A fresh needle (replaced often) will go through your fabrics more easily and will keep your machine happy. I use a universal machine needle in size 80/12 most of the time. If you use very tightly woven fabrics, a microtex needle might work better for you. Quilting needles are meant to go through multiple layers. There are points in the process where the layers will be fairly thick. If your machine struggles, you might need to experiment with your needle size or type. Try a few out before buying in bulk.
Other
To precisely cut the fabrics for sewing, a rotary cutter, cutting mat, and quilting ruler are very handy. Otherwise you will need some other means of marking and cutting. You can make a paper pattern to cut around with fabric shears, or mark with chalk or other fabric marking pen. I sometimes use Pilot Frixion pens, as the marks disappear with the heat of the iron.
A steam iron and pressing surface are essential. Much of the work is done with the iron. I use a gridded pressing surface (the June Tailor Cut n’ Press II) but any ironing board will do.
I prefer sewing clips such as Clover’s Wonder Clips or similar rather than pins if I need to hold things together. I’ve seen people use small binder clips in a pinch.
Embroidery scissors or snips will help you trim off threads to finish your masks. A seam ripper might come in handy to fix any mistakes.
